Creating a remitter
On the page, you can see a list of all the remitters that are associated with your account. On this page, you can view existing remitter details and you can add new remitters.
To create a new remitter
-
In the toolbar, under, click .
Mandatory fields are indicated by an asterisk (*).- —From the dropdown, choose the option that best describes the remitter or the remitter's business. If the remitter is an individual, not a business, choose .
- —Enter a unique identifier for the remitter.
- —Enter the remitter's first and last name or the name of the business. You can enter up to 100 characters in this field.
- —Enter the remitter's street address.
- —Optionally, enter the second line of the remitter's address.
- —Type the name of the city or choose it from the dropdown list. When you start typing the name of the city, a dropdown list appears that includes many of the cities in the specified country that contain that sequence of letters. If the city that you want is in that list, click to select it.
- —From the dropdown list, choose the state or province where the remitter lives. The list that you see depends on what you entered in the field.
- —Enter the remitter's postal code or zip code. This field is mandatory when the selected country is or .
- —Enter the remitter's email address. You can enter up to 50 characters in this field.
- —Enter the remitter's bank name.
- —Enter the bank's routing code.
 bank icon in the field and use the tool to locate the bank. For more information, see Using the Bank Search tool.
-
Click .
The remitter is added to the grid on the page.
When you create payments, you can now select this remitter as the entity on whose behalf the payment is being sent.
Using the Bank Search tool
The tool allows you to search for the remitter's financial institution by entering information in at least one field. The search will return all matching results based on the criteria you enter. You can then select an institution from the results list and the information is populated in the section on the screen.
To search for a bank
-
In the field, click the
bank icon.
The dialog box displays.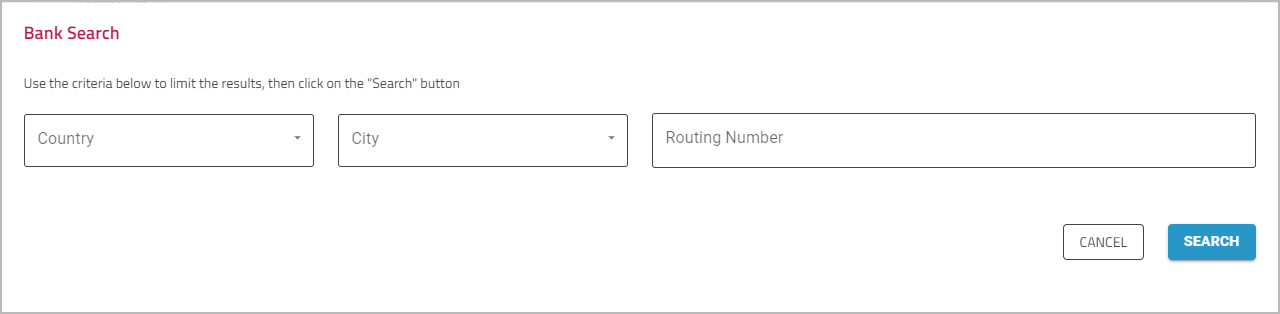
-
Enter information in the fields to search by , , and . The more information you enter, the more refined your search results will be.
-
Click .
The search results are displayed in a grid. -
Click the bank that you want to choose.
The bank's details are added to the appropriate fields on the screen.